(live collections)
To manage existing Occurrence (= Specimen) Records live inside the portal, first log into CNALH with your user account.
Then go to My Profile and select the Specimen Management tab. From this tab choose “your collection name” [the example below features screenshots from the University of Oklahoma Lichen Herbarium (CSU:Lichens)].
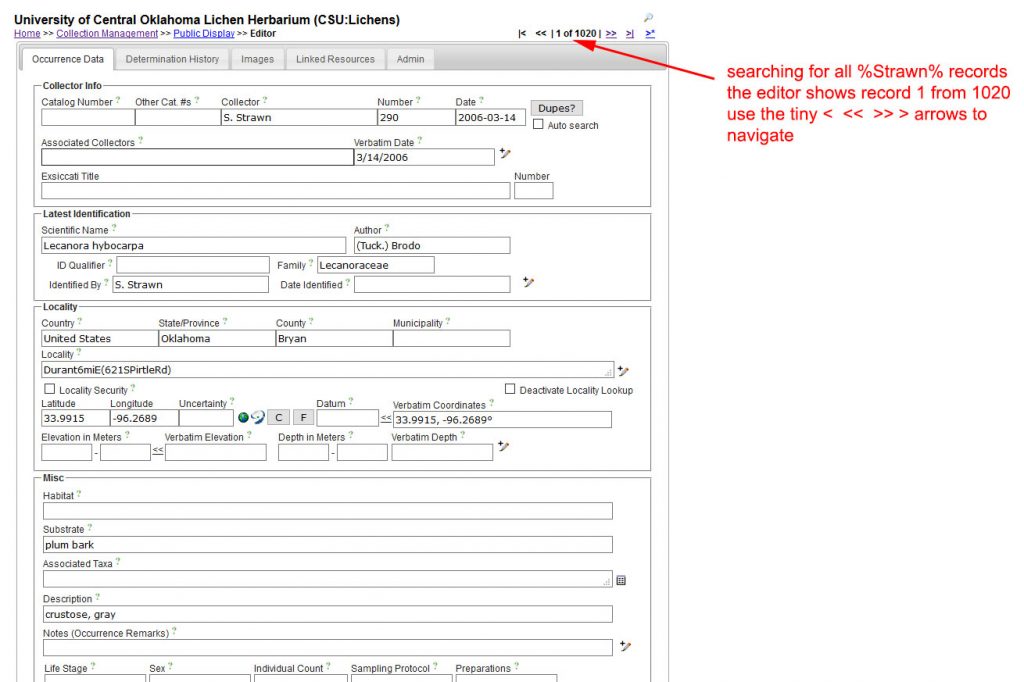
From the Data Editor Control Panel you can add new occurrence records or edit existing occurrence records. For the purpose of this Tutorial choose edit existing occurrence records. A search box will appear. If you do not enter any criteria and hit display editor, the first record of your collection will show up in editor view:
Here you can review the data already entered for accuracy and make any necessary edits. The small green “?” provide useful hints what kind of data should be entered into the different fields. The Dupes button allows you to search the Consortium for duplicate records of your specimen.
Note the |< <<| x of y |>> >| arrows at the top of the page. They help you navigate from one record to the next. The magnifying glass icon brings up the search box again, where you can adjust the criteria of the records retrieved that you want to edit.
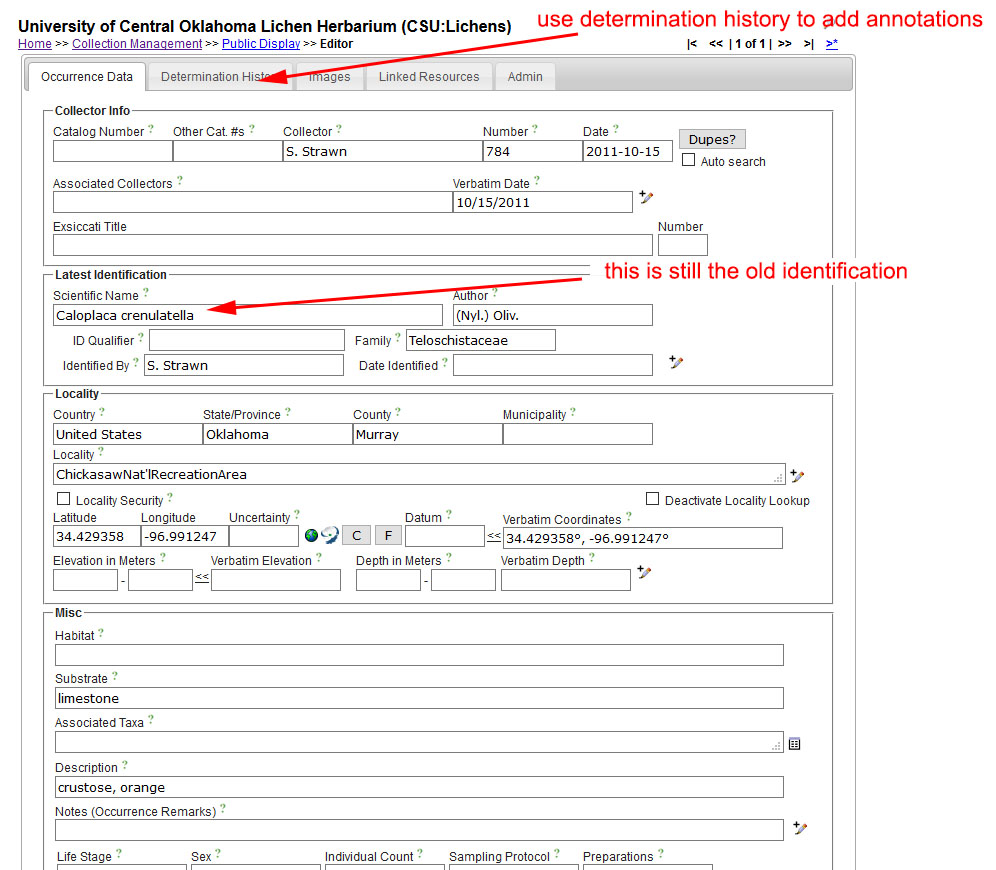
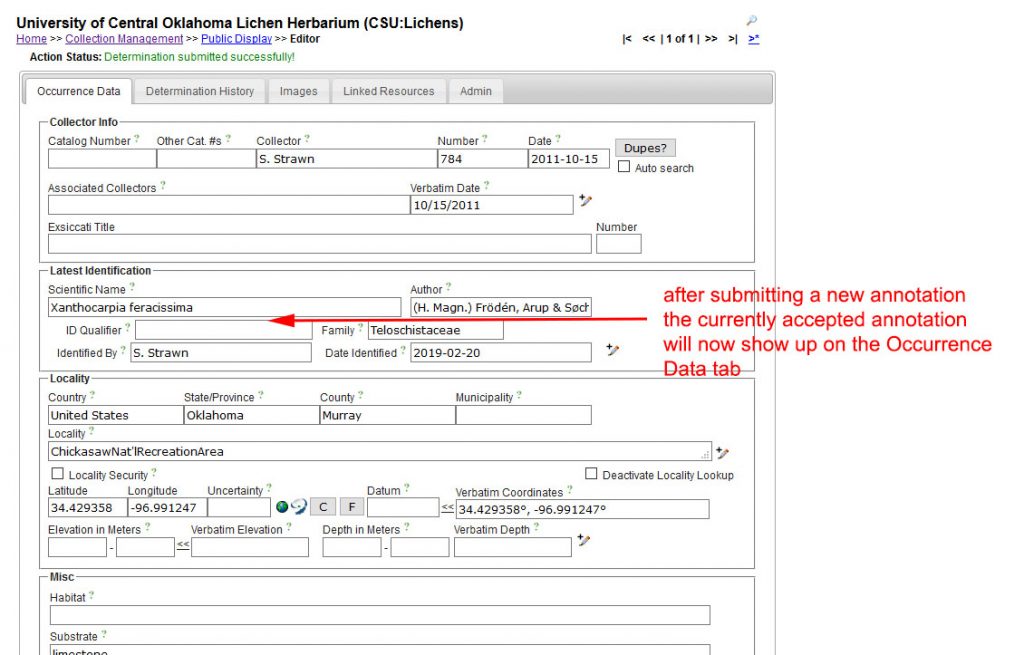
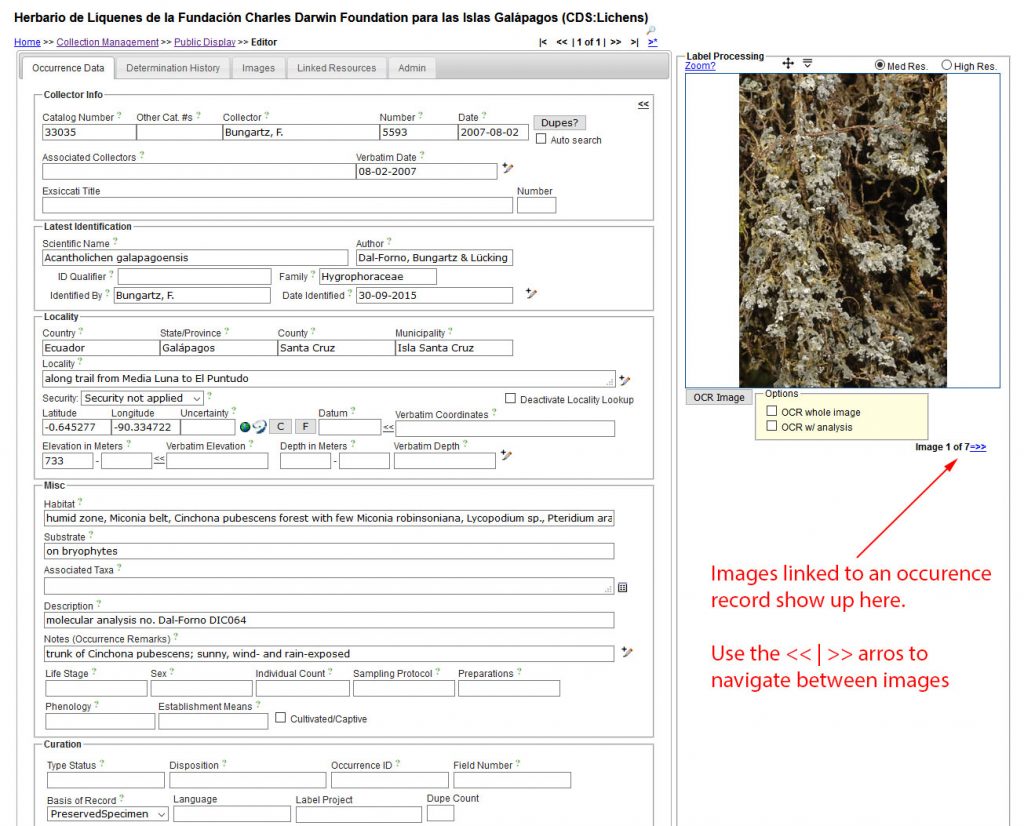
The Occurrence Editor includes several tabs: Occurrence Data displays all current information about a specimen, i.e., who collected the specimen, where it was collected, who identified it & how, etc.
Only the most current identification is shown here. In the example below the original identification of the specimen is Caloplaca crenulatella (Nyl.) Oliv.
You should never overwrite this original identification !!!
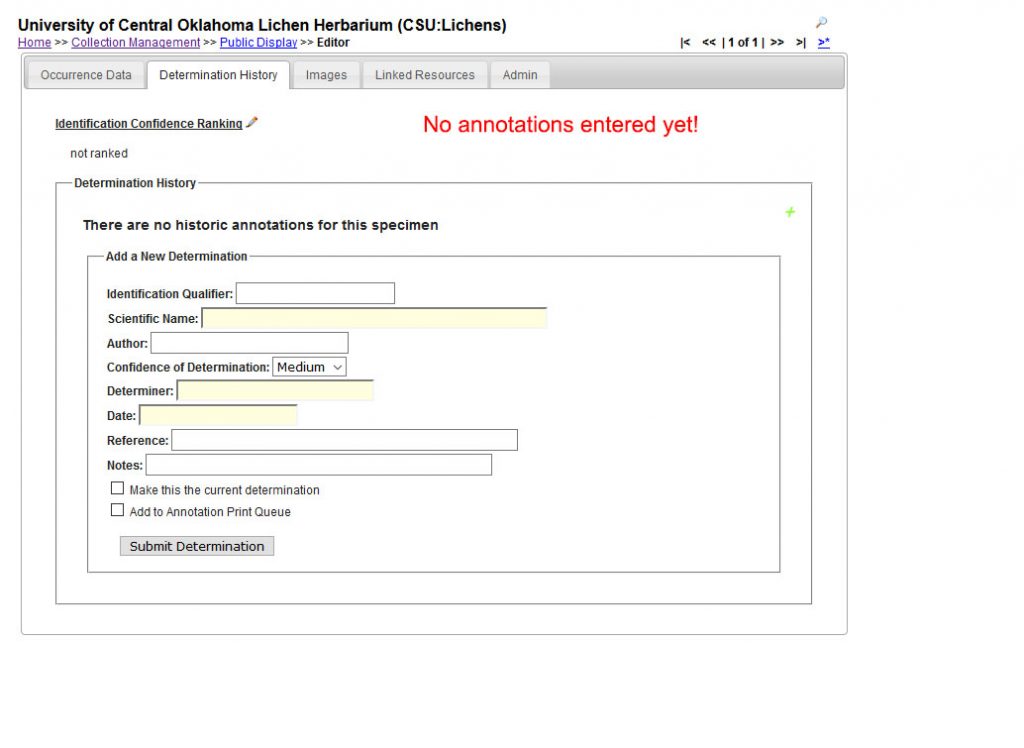
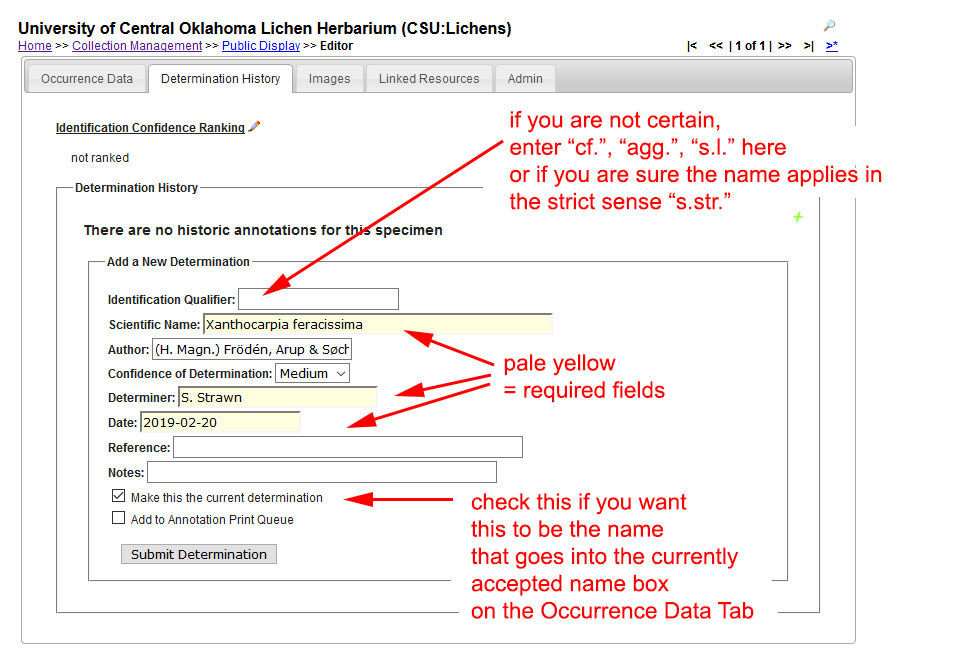
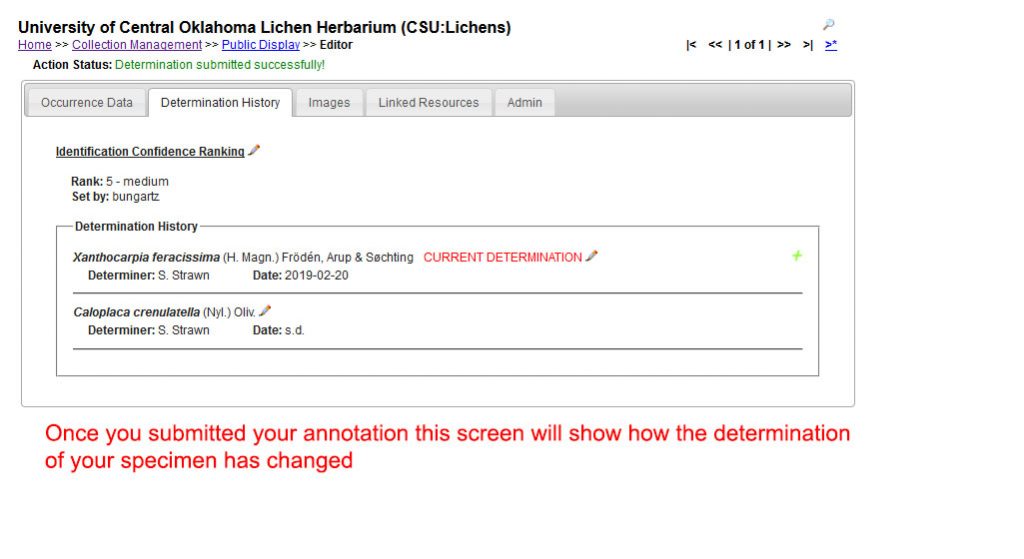
Instead navigate to the next tab Determination History to change an identification:
The Determination History allows you to keep track of all identifications of your specimens, i.e., how identifications have changed over time. Select one particular annotation (not necessarily the most recent one) as accepted. Only the accepted identification will be shown on the Occurrence Tab.
Per default the search that displays your specimen data (occurrence records) is collapsed, but you can expand the current search criteria at any time clicking the magnifying glass – and then modify the search. [Searches work only within one and the same collection. If you have editor rights for several different collections, you must navigate back to My Profile and select a different collection there to edit occurrence records from this other collection.]

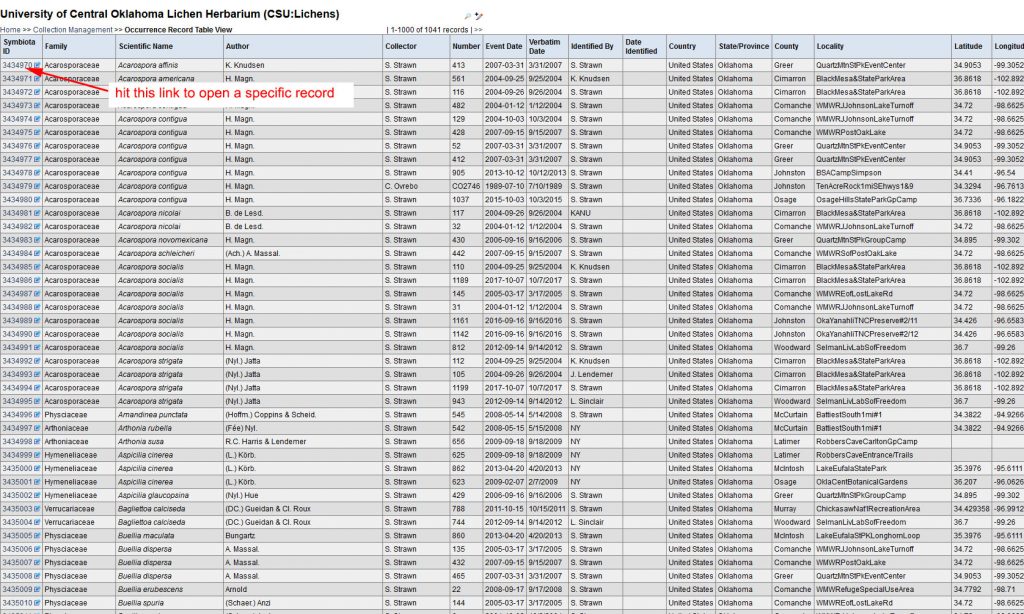
The data from a search can not only be seen in the Occurrence Editor, but also in Table View:

In Table view occurrence records are shown 1,000 records per page.
You can navigate between pages using the navigation arrows at the top of the page: << | >>
You can quickly access a specific record, clicking the Symbiota ID link.
[Please also note the pencil icon at the top of the Table (next to the magnifying glass icon). It opens the Batch Update Tool, which allows you quickly change contents of a particular field throughout the whole table (based on the current search criteria). CAUTION: be very careful using this tool; it if often not possible to reverse batch updates.]
There are several ways to modify your search, e.g., using wildcards or combining the default fields with several custom fields.

If your occurrence record is linked to one or several images, the first image will be shown at the right. Navigate back and forth between several images via << | >>.
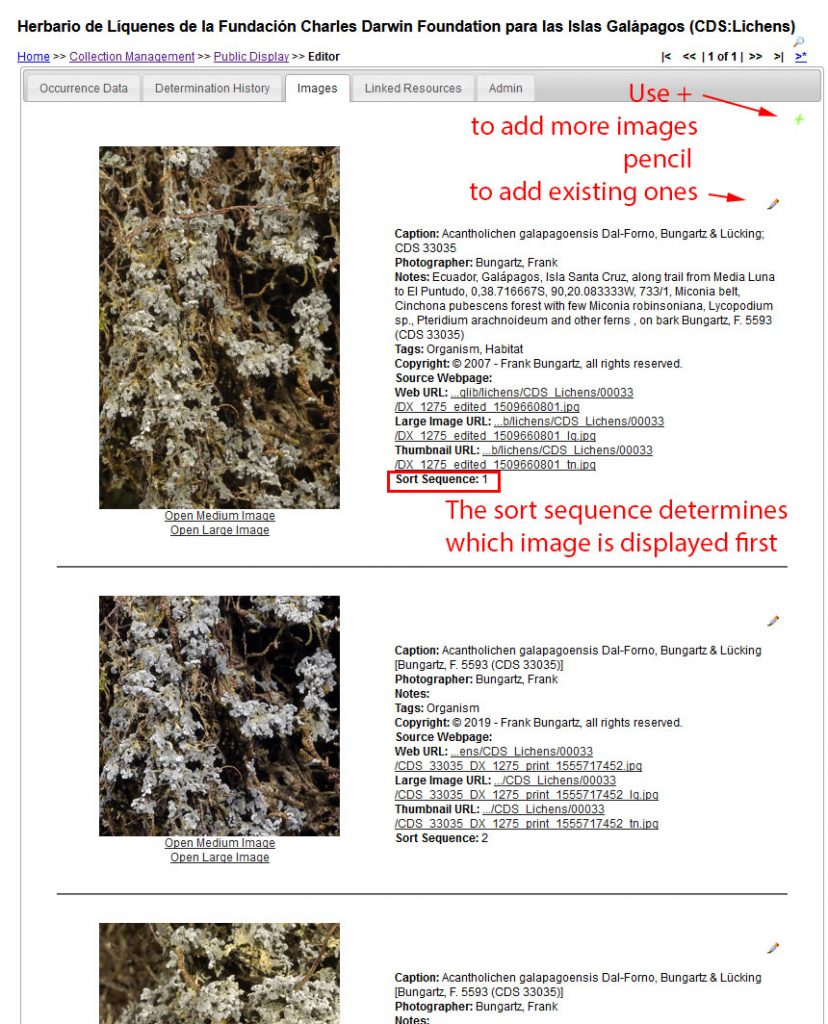
To Add & Edit images, select the Images Tab.
On the Images Tab you can add images using the green + sign, edit image metadata via the pencil icon (for example change the sort sequence, add a caption, etc.).
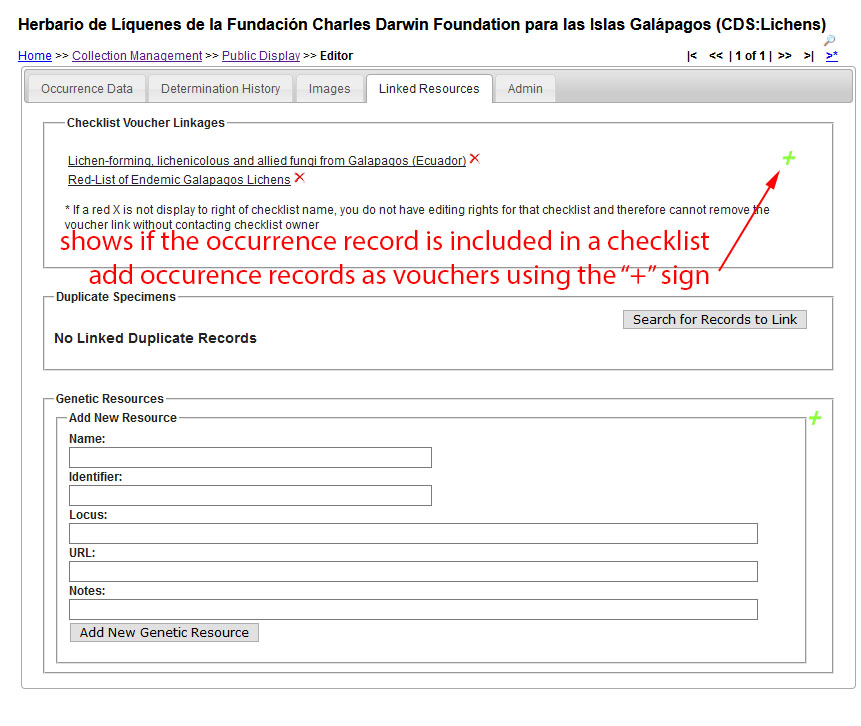
The Linked Resources Tab displays if your occurrence records are for example linked to one or several checklists, if duplicate records in your collection or a different collection exist, and if your specimen acts as a voucher for a genetic resource (e.g., in Gene Bank).
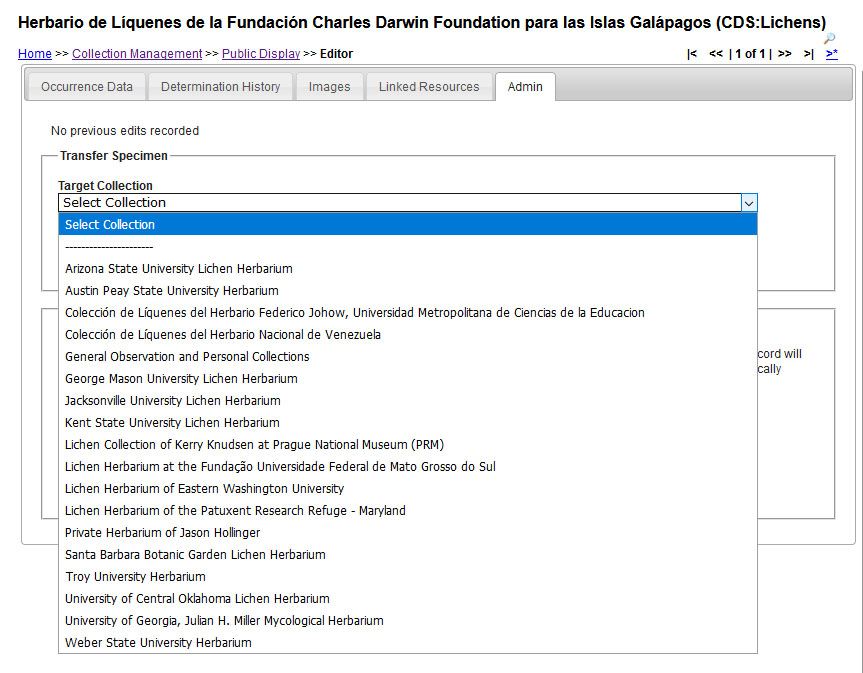
From the Admin Tab you can evaluate a record for deletion and, if no linked resources exist (images, checklists, linked resources), you can then safely delete this particular occurrence.
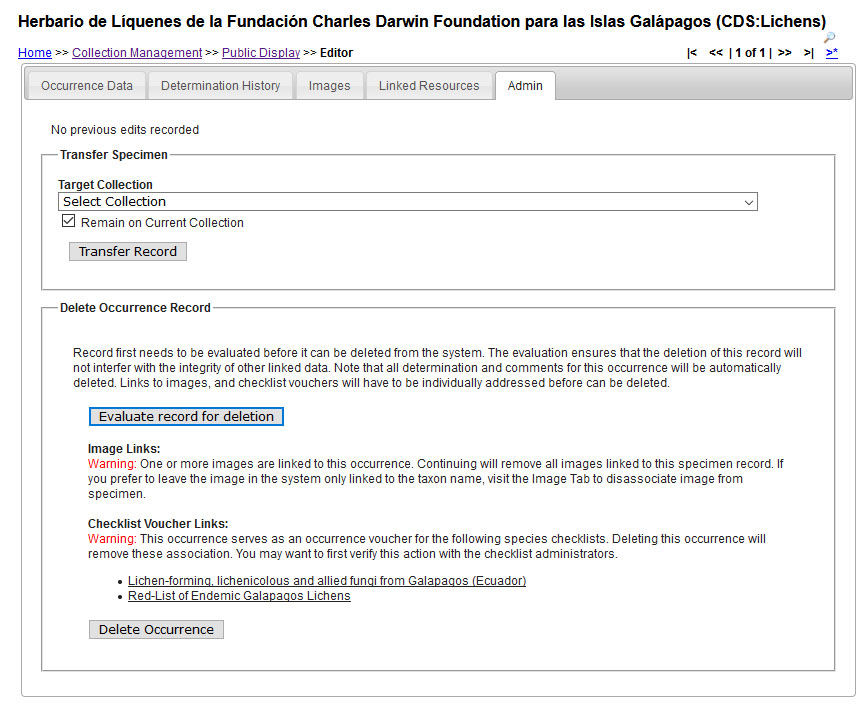
The Admin Tab also allows transferring individual occurrence records to a different collection. [This can be particularly useful, for example, if you have a class of lichenology students, who, as part of their assignment, entered specimen records as Personal Collections and then decided to donate these specimens to your institution.]
Only individual records can currently be transferred. If you need to batch-transfer specimens, contact CNALHadmin@asu.edu.