(includes: how to link voucher specimens to your list)
Creating New Checklists
Check this out:
Our new Symbiota You Tube Channel now also offers several videos on how to create and manage Checklists.
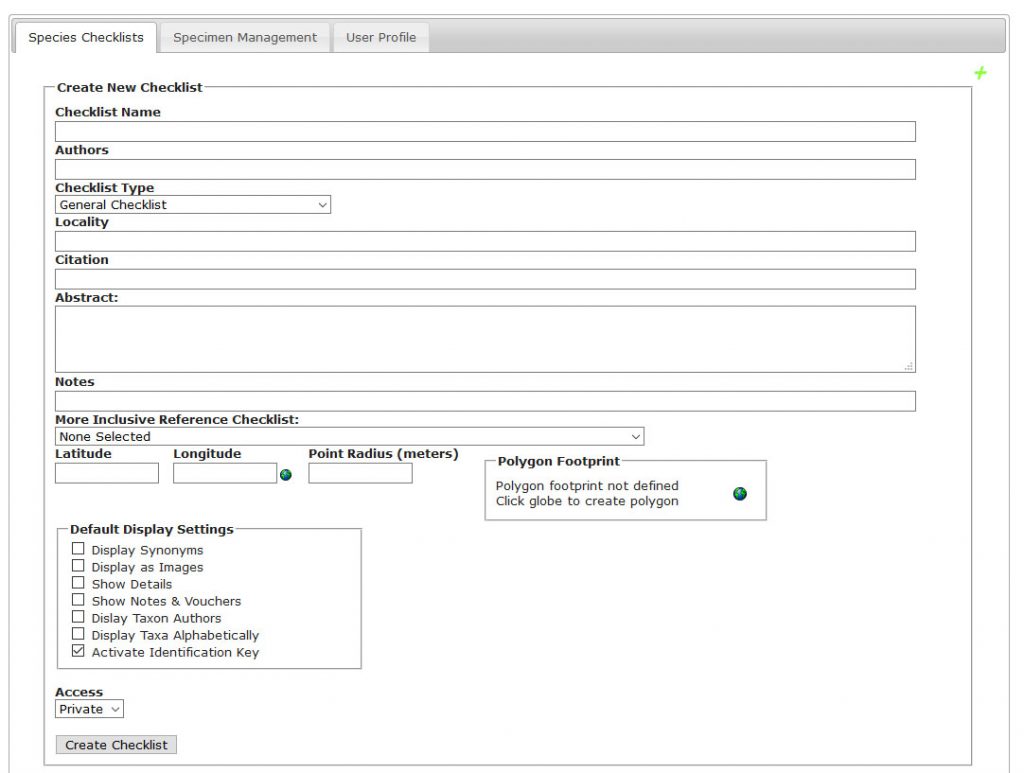
Once registered any new user can create Checklists. Log in and from the Checklist Tab click on the + sign in the upper right corner:

Configure and Administer Existing Checklists:
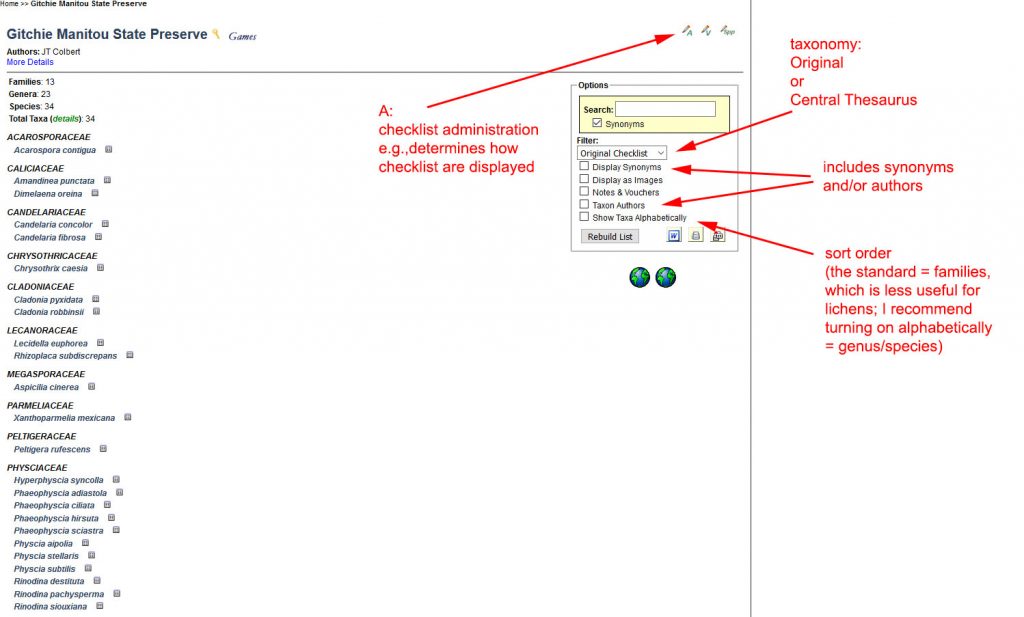
Below is a screenshot of a simple checklist, displayed according to the default options: as a simple list of taxon names (without authors), sorted by family, displayed in Original Checklist view (i.e., how the names were originally added to this checklist).
Anyone visiting the page can change these display options “on the fly” by checking different options and hit Rebuild List.
However, as a checklist Administrator you also can change the default display options (use the “A“ pencil icon opens the checklist administration options).
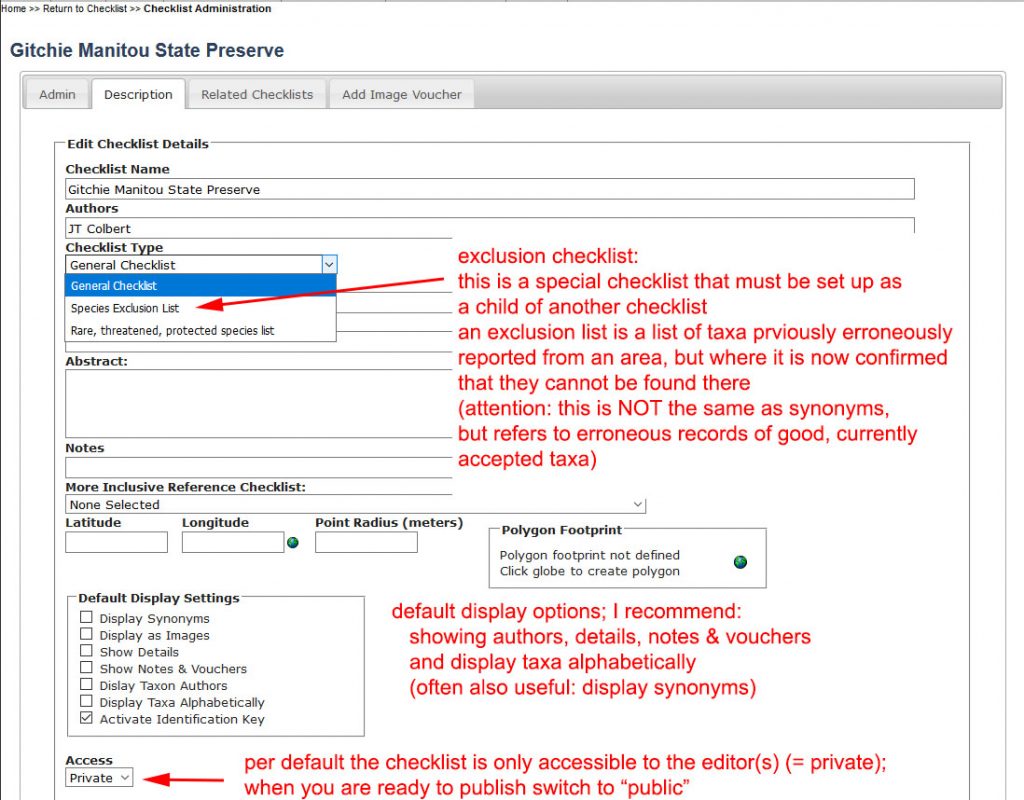
Below a screenshot of Checklist Administration Options; on the second Description Tab you can configure how your checklist is being displayed.
On this tab you can also edit information who is the author of this list, how to cite this checklist, an abstract and notes, a geographic bounding box or polygon of the region that list applies to.
Per default any newly created list is kept private until you decide to make it publicly available.
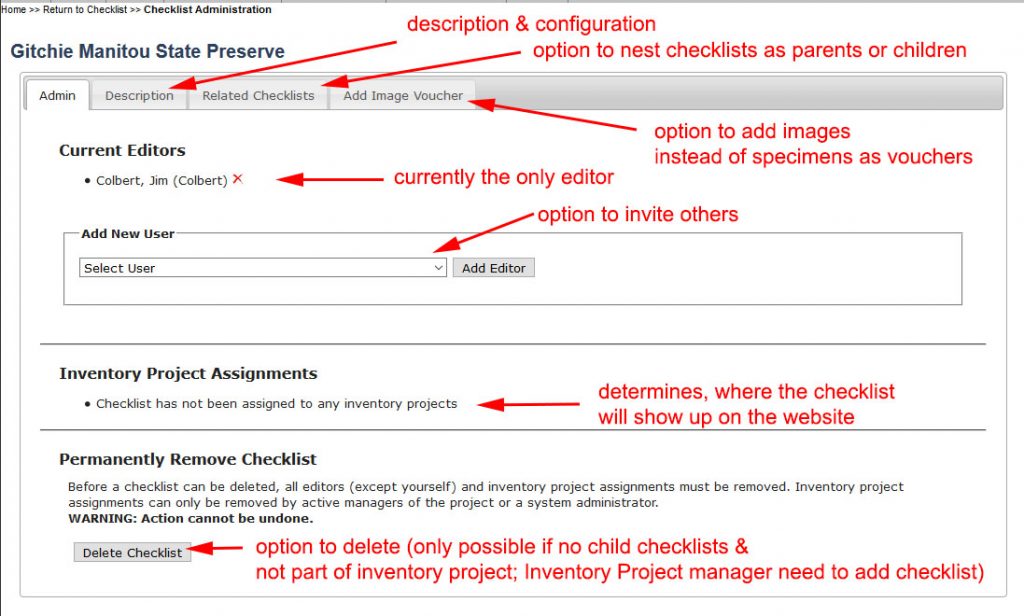
The first Admin Tab allows you to give collaborators editing rights to help you build your checklist. It also displays if your checklist is included within an Inventory Project. And this tab also allows you to delete the checklist.
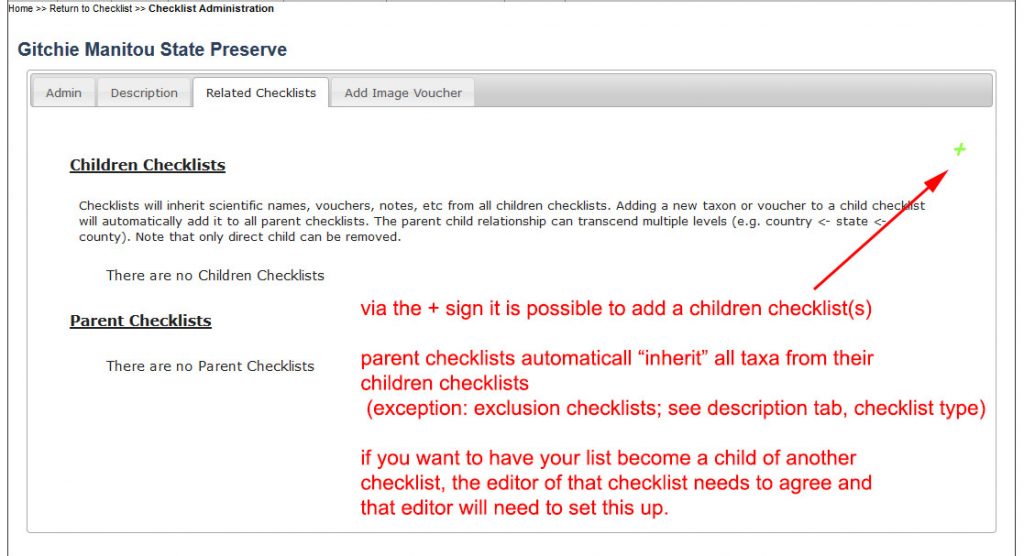
The Related Checklist Tab allows you to add Children Checklists to your list:
Once you configures different display options in Checklist Administration the default view of your list will change, below for example taxon names are now sorted alphabetical by genus, displayed with authors, synonyms, notes and vouchers.
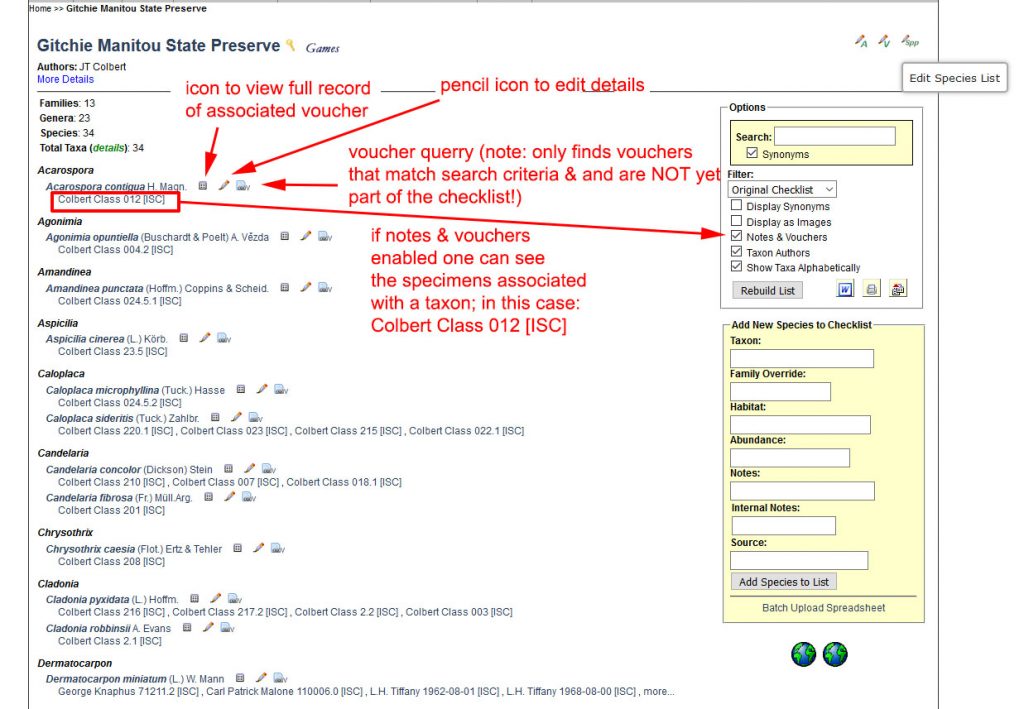
Next, we will review how to manually add names and modify existing notes and vouchers in Checklist Editing View (below). Use the “spp“ pencil icon to open a panel that allows you to add taxa manually and associated information manually, or by uploading a spreadsheet.
The “spp“ pencil icon will also activate another set of icons for each taxon in your list. These icons allow you to modify existing information associated with the taxa included in your list (notes, vouchers, etc.):

The screenshot below explains the different icons available in Checklist Editing View and also shows an example of a taxon linked to a voucher specimen.
The pencil icon next to a taxon name opens the details window. There are two tabs: in the General Editing Tab you can add a lot of information for each taxon, rename and transfer its vouchers, or delete it from the list.
[IMPORTANT: If your checklist has a child checklist per default the notes from the child checklist will be displayed in the parent checklist – unless (!!!) you enter different information for a taxon in a parent checklist; the children checklist do not inherit information from the parent checklist and any data entered into the parent checklist overrules what otherwise would be visible from the child checklist]

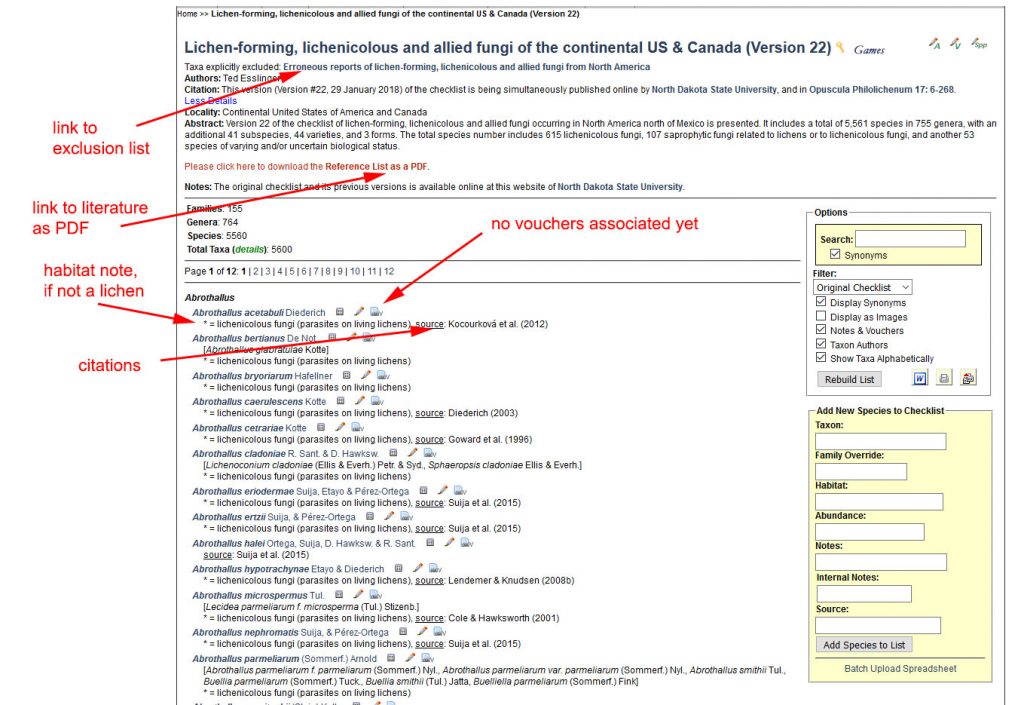
Below an example from a more elaborate checklist, the Lichen forming, lichenicolous and allied fungi of the continental US & Canada by Ted Esslinger.
This list includes: (1) a child checklist of erroneous reports, (2) notes, whether a taxon is a lichenicolous fungus rather than a lichen, (3) the display of synonyms is enabled, (4) citations have been added to the source field, and (5) a reference list can be downloaded as a PDF.
[You can add the link to a PDF, information who is the author of this list and how to cite it, an abstract, etc. – all from the Checklist Admin Description Tab, accessible via the “A” pencil icon]
Next we will review how to add some voucher specimens. Enable checklist editing mode and click the voucher icon next to the taxon name. This opens a window to manage vouchers associated with your checklist.
In the screenshot below of the New Vouchers Tab all taxa included in the list are associated with vouchers. To add more vouchers, switch the display mode:
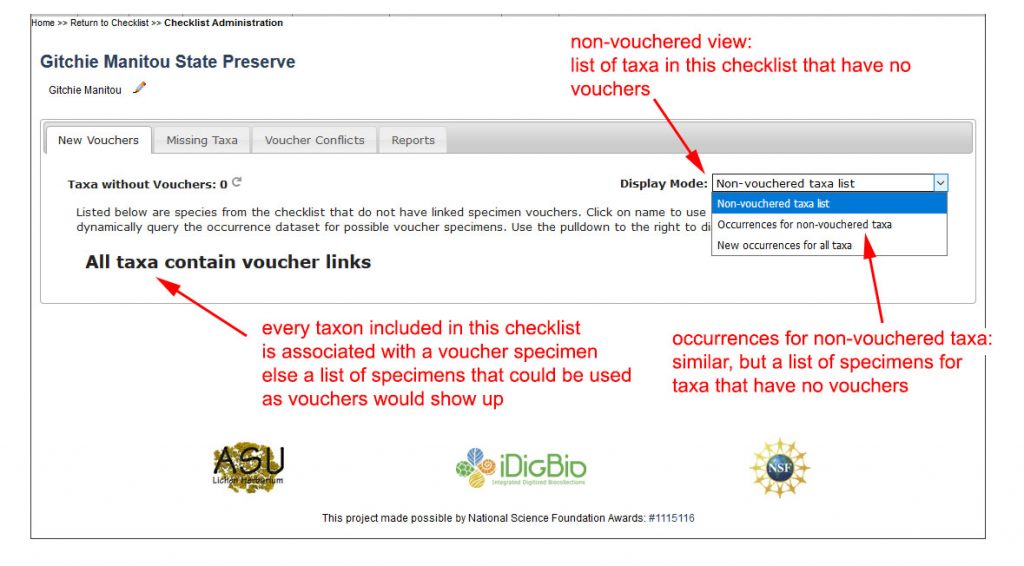
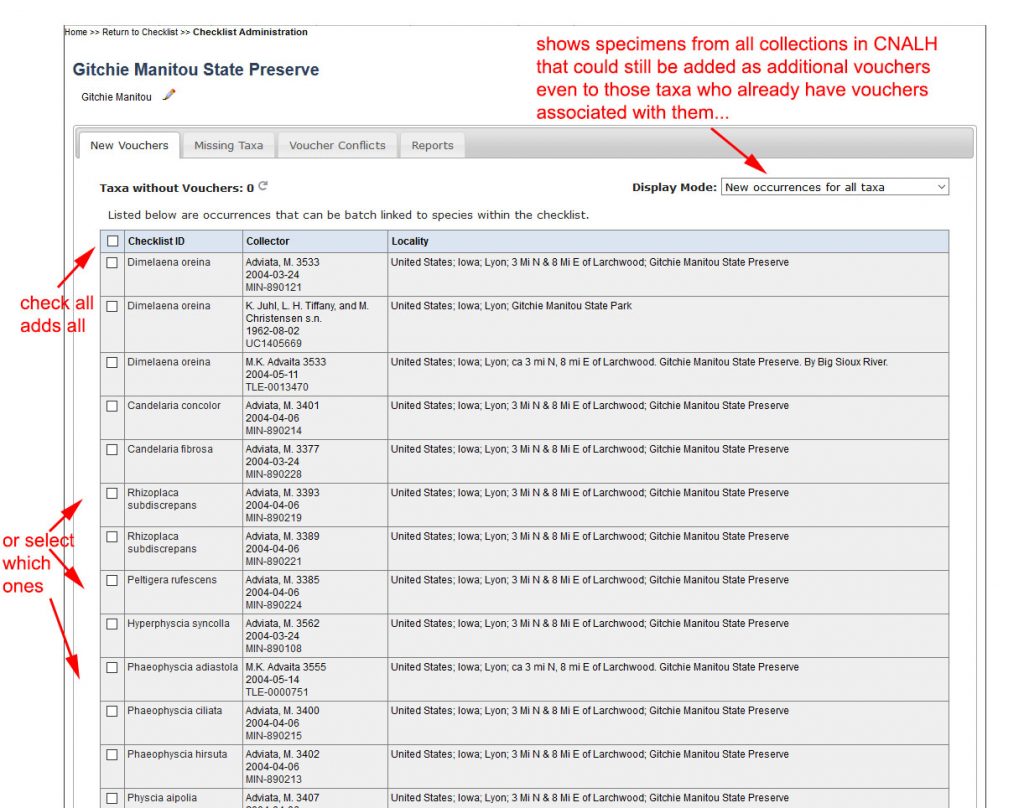
New occurrences for all taxa presents a table with vouchers that you may want to add. Review the list and add only the vouchers, where you trust that their identification is correct.
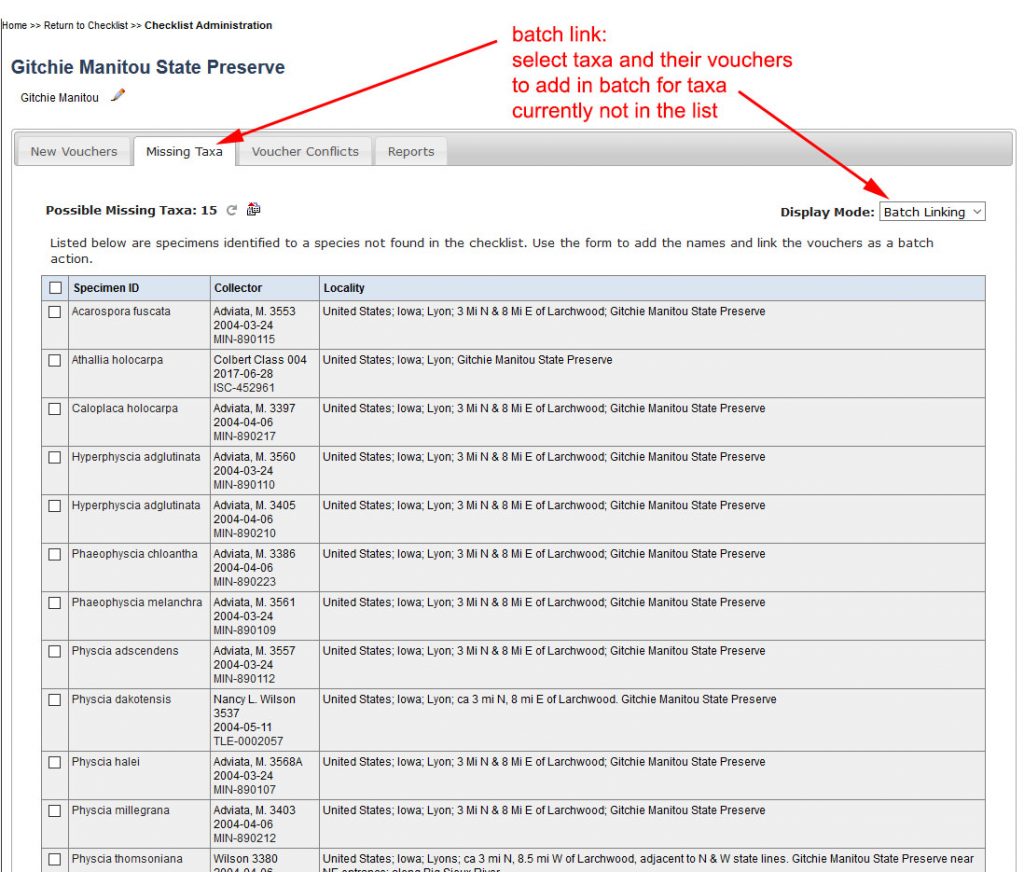
On the Missing Taxa Tab you can review a list of taxa currently not included in your checklist, but represented by some specimens deposited in a collection that participates in CNALH. Clicking the chain-link icon next to then names opens a window that will bring up a list of specimens identified as that missing taxon and an option to add these specimens as a voucher to your checklist, thus also adding that taxon to your list.

However, batch-linking is often a more efficient way to review and add specimens of missing taxa:
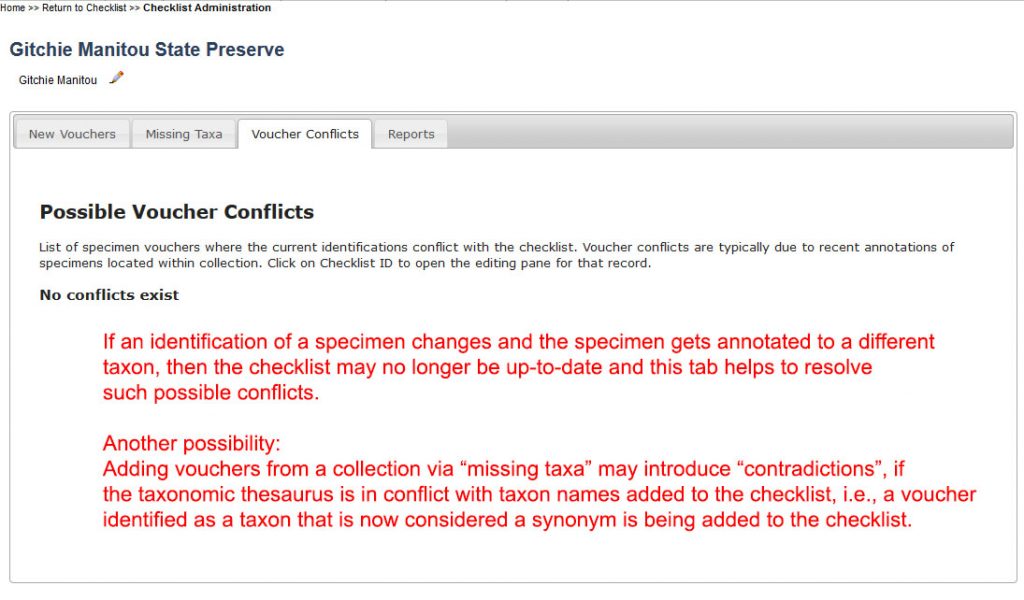
Finally, the Voucher Conflicts Tab will show if there are any discrepancies between your checklist and associated vouchers: